The best way to visualize a packet is to think of a physical packet of forms that your child has brought home from school, all stapled together. A packet on your website consists of a series of pages that your users will visit in a certain order. You can include multiple different types of pages to show they belong together. Your packets might include these types of pages: Event registration, Volunteer sign up, Informational, Products for sale, and Payment.
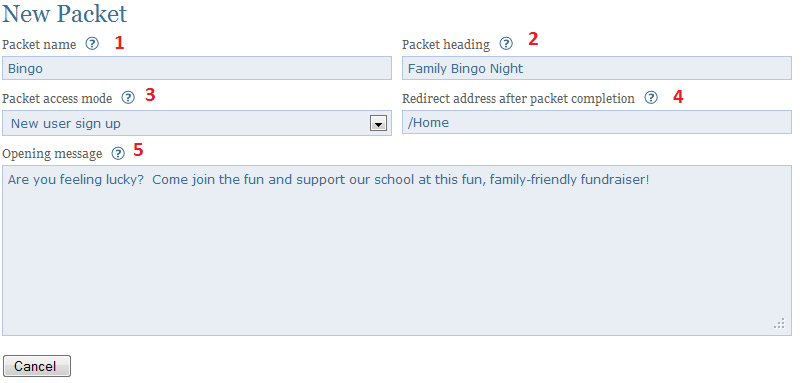
Below is an example of the Admin side when adding a New Packet: (Please note the numbers on both images and the table as they will show the correlation between the front and back side of the site).
|
1 |
Packet name |
The name is a unique identifier for this packet, and will be used in the web address to reach this particular packet. This should be as short as possible, while still being indicative of the nature of the packet. |
| 2 | Packet heading | The heading is what will show up near the top of the packet. Your users will see this, so choose a heading that is descriptive of the packet. |
| 3 | Packet access mode | This setting affects who will be able to access this packet. Choose "New user sign up" if this packet is intended to be your First Day Packet. This type of packet allows new parents to create an account on the website if they don't already have one. Choose "Guest" if you would like to allow people outside your school community to access the packet (Note the access mode will make the packet not available by parents or staff at your school, maybe say because the packet has higher item price. There is an "Signin User packet url" entry in packet details. If current packet is only intended for guest, and there is an matching packet for staff/parents (say with a lower item price), this url can be put in here so staff/parents can be redirected to the correct packet if user is signed in). Choose "User sign in" if this packet is only accessible to parents who have created an account on your site. Choose "Guest and User sign in" if you would like to allow people outside your school community to access the packet as well as staff/parents and the packet have exactly same settings for them. Choose "Authorized users only" if this packet is only accessible to those users whom you have specifically marked as authorized users (often - paid members of your site). |
| 4 | Redirect address after packet completion | The web address of the page to which the user will be redirected once he/she has completed the packet. |
| 5 | Opening message | This text will be shown to the user on the first page of the packet if the packet's access mode is either "New User Sign up" or "Guest". Other access types will go directly to the first page. |
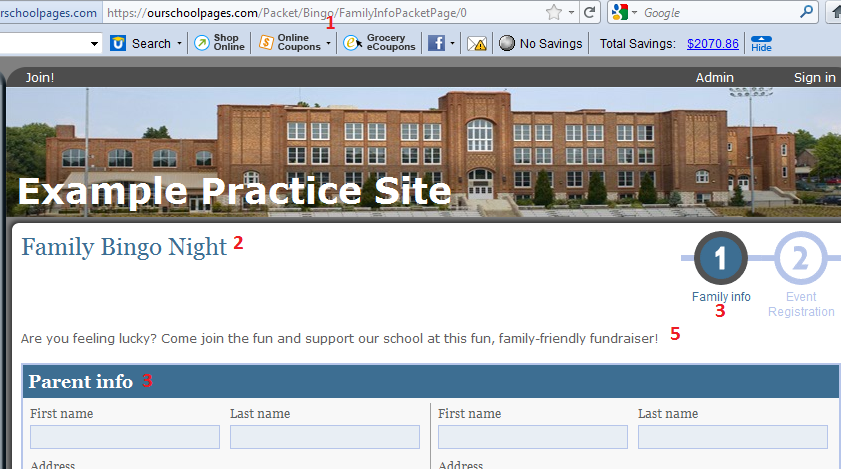
Note: There are two 3s on this diagram. This is to demonstrate that because "New user sign up" was chosen from Packet access mode (see image above), the first page of the packet is a page for new users to register on the site before they are able to register for the event. Depending on the access mode chosen, the resulting first page may be different from this one.
Also, there is no 4 on this page. That is because the page that will come after a person leaves this process is not shown here, but will correspond to the address you provide in the Redirect address after packet completion box.