value: 561493F97D06BAFAF4460A1BF049930A60717B133650E8EFA221B499F7FFAEB9
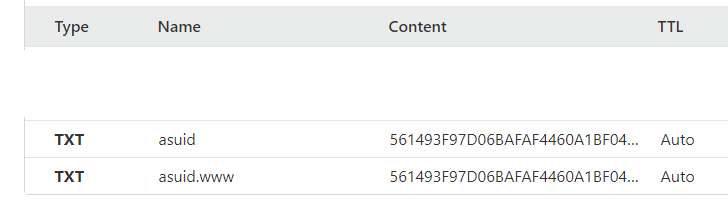
For example, on CloudFlare DNS this is what the TXT record should look like.
2. Append your domain below and visit the URL:
example:
You should see something like this:
domainName ourschoolpages/apollopta.org, hostNameType Verified, sslState null
domainName ourschoolpages/www.apollopta.org, hostNameType Verified, sslState null
if you don't see "hostNameType Verified", wait 5 minute and try again. If you can't get it work after 1 hour. Stop and contact us.
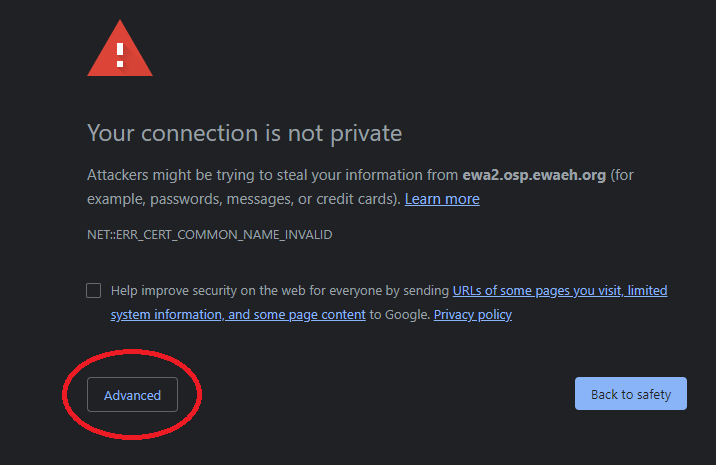
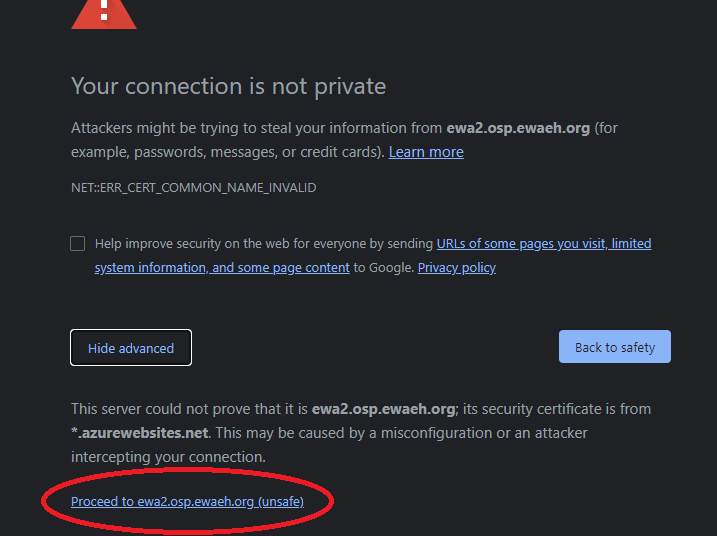
After step 2 completed successfully our server now is able to serve for the domain name configured. Now you need to change the DNS record to point to our server, so traffic will be served from our server. After you complete step 3 and 4 below, but before step 5 is completed successfully, our server will serve pages but there will be SSL cert mismatch warning, and user will need to choose "Advanced", and "Continue proceed to "your domain" (unsafe). Like below image.
So there will be some sort of "downtime" or "bad experience" for up to a few hours when proceed with step 3,4,5. Please plan ahead. If you are using DNS provider like CloudFlare (we personally recommended. We are not affiliated with cloudflare other than we also use CloudFlare services.) which also provide free CDN and free SSL then it is possible to use CloudFlare's SSL so there will be no downtime. Please see the special notice section about details using CloudFlare.
3. Add or change A record:
Double check your current DNS record TTL (Time to Live) setting. If it is longer than 1 hour, for example 21600 which is 6 hour, please update TTL to a smaller value like 1800 (half hour) and wait at least original TTL time (for example if old TTL is 21600, then need to wait at least 6 hours so new TTL will be in effect). After everything checks out the TTL can be set back to original values.
Change your A record for root domain "@" to: 40.118.185.161
4. Add or change A record for 'www':
Follow same TTL checking in step 3. Change A record www to: 40.118.185.161 (Or you can choose to use CName point to your root domain instead).
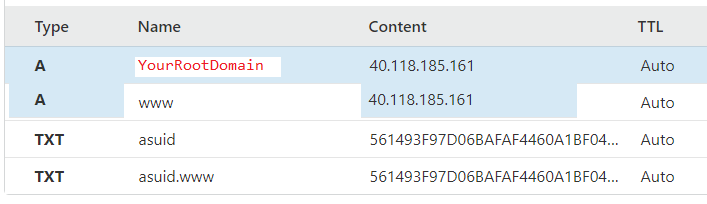
On CloudFlare this is what is looks like after step 3 and 4. Note the when input "@" it will be changed to your root domain by clouldfare. Other DNS provider may choose to show "@" instead. (Note instead of CName you can also choose to setup A record for www to point to 40.118.185.161 too).
5. Add SSL by visiting this url:
example:
https://ospletsencrypt.azurewebsites.net/api/domain/ssl?domain=apollopta.org
You should see a message "Job to update SSL triggered:" or something like this:
"Last run 202010190444391043 status Success start 10/19/2020 4:44:39 AM end 10/19/2020 4:44:46 AM"
When you see above message, you should be all done. Wait for 2 minutes. Try visit your site and verify SSL is enabled and there is no SSL cert mismatch warning. You may need to manually clear your local DNS cache. (On windows, run "ipconfig /flushdns" command. For other OS like Mac/Linux please search for "[YourOSHere] clear dns cache" ). If it doesn't work, contact us.
If you see the message "Cannot validate if xxx is pointing to OSP servers. Test file not match", Please wait 5 minute and try again as DNS changes takes time to populate (up to the TTL set for the record which normally is 1 hour or 1/2 hour). If you can't get it work after 1 hour. Contact us.
6. Update Custom domain in settings:
Special notice if you are using CloudFlare (https://www.cloudflare.com/) as DNS provider:
There are a few advantages using cloudflare as free dns and cdn provider.
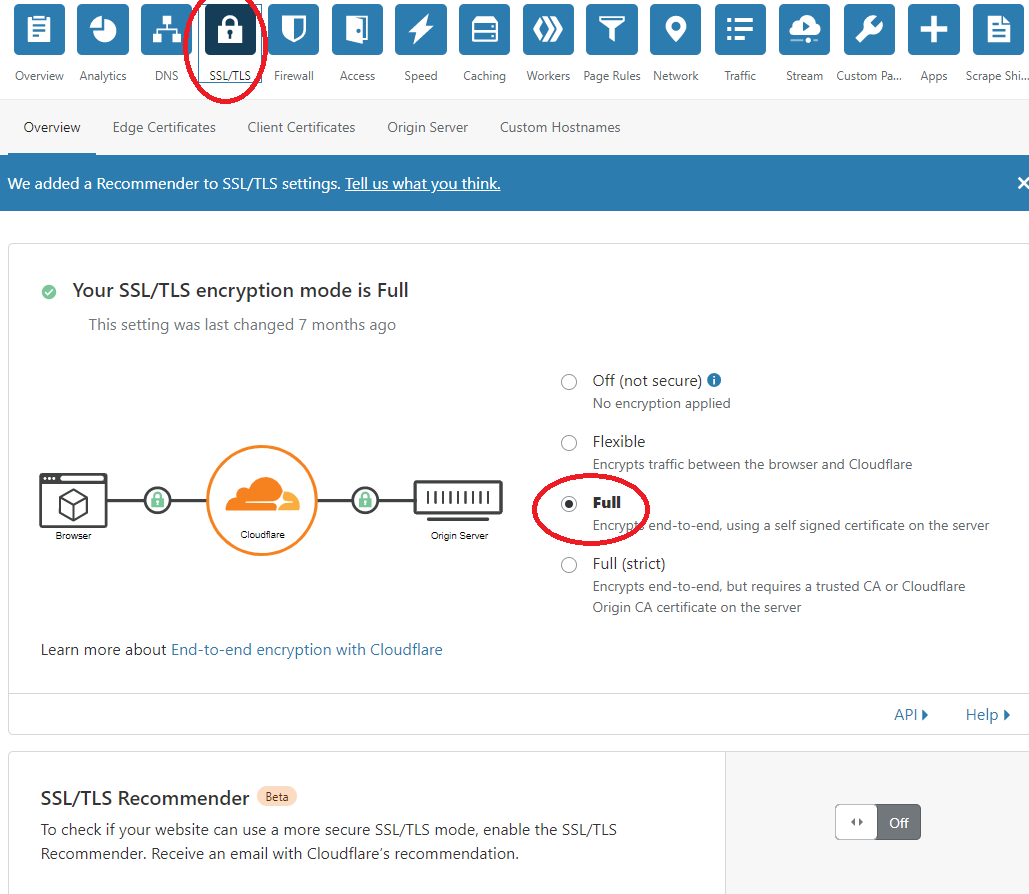
When doing step 3 and 4, in CloudFlare SSL/TLS setting tab, Make sure to select "Full" mode so cloudflare will provide SSL and user will not see cert mismatch error and give you enough time for dns change to populate. In fact the step 5 is totally optional in this case unless you want Full(Strict) mode. After step 5 completes you can also choose to change to Full(Strict) mode, or just keep at "Full" mode.