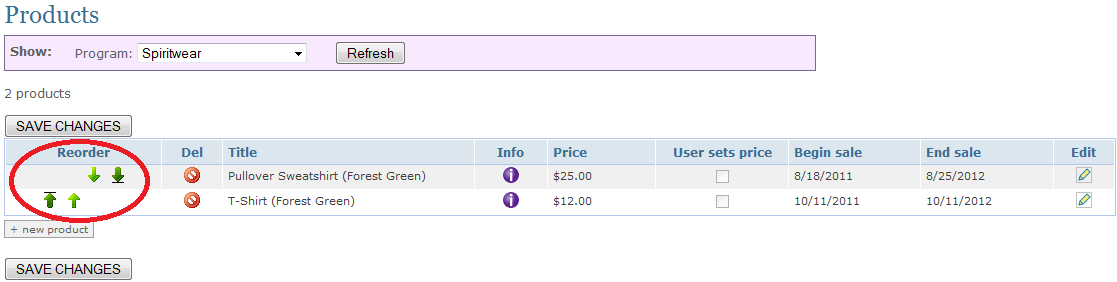
A Product, as defined by Our School Pages, is anything you are trying to sell or collect money for on your site. A Product is defined as belonging to a Program.
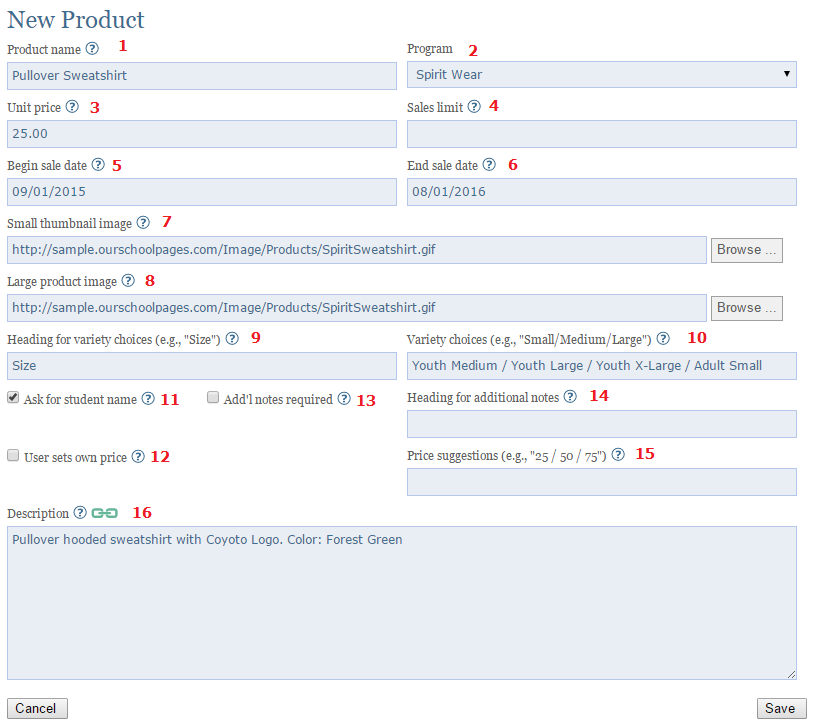
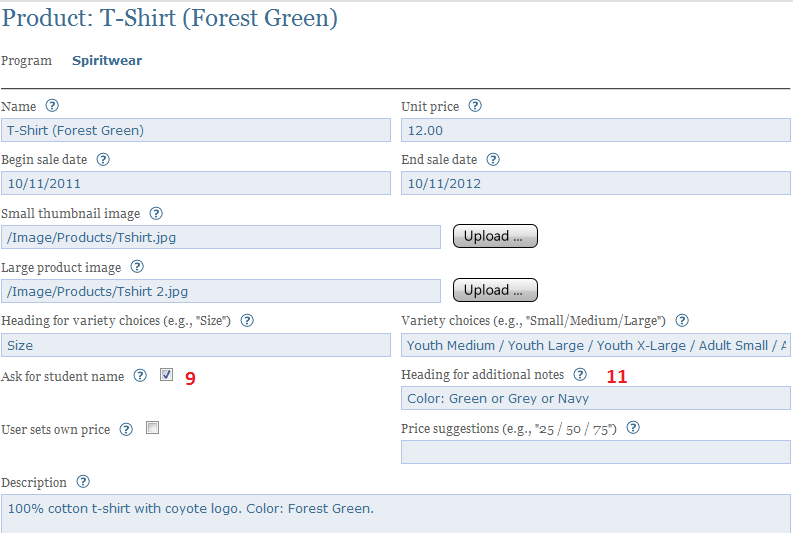
| 1 | Product name | Name of the product. Examples: Large Popcorn, Hot dog meal, PTA Membership, Renewal Membership, Yearbook. |
| 2 | Program | The program to which this product will belong |
| 3 | Unit Price | Dollar amount of the product. |
| 4 | Sales Limit | The number of units to sell |
| 5 | Begin Sale Date | Date you would like to make the product available for sale (default is the day you input the product information). |
| 6 | End Sale Date | Date the sales end. After this date a message will appear to the user that the product is no longer available. |
| 7 | Small Thumbnail image (optional) | A small 100 x 100 pixel image that represents your product, displayed on the products for sale page. |
| 8 | Large product image (optional) | A larger 300 x 300 pixel image, that is shown when the mouse pointer hovers over the thumbnail image. |
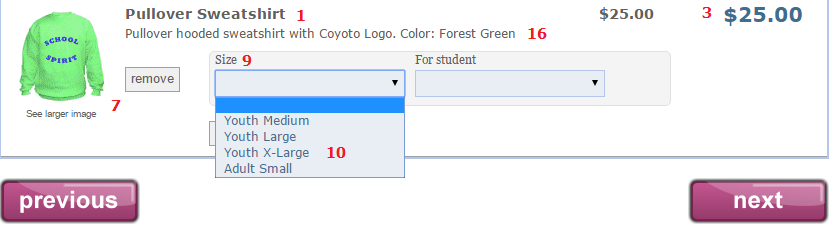
| 9 | Heading for variety choices (e.g., "Size") | The title for choices. Could be "size", "flavors", "toppings" (as in pizza choices). See below for an example of where this will be displayed during the order process. |
| 10 |
Variety choices (optional) |
Displays on order screen. Examples: Small/Medium/Large or Buttered/Plain or cheese/pepperoni/combo. All choices must be separated by a forward slash. These choices will be available from a drop down box. See below for an example of where this will be displayed during the order process. |
| 11 | Ask for student name (optional) | Used for personalization or for pick-up purposes on the night of the event. This will show up as a drop down menu box and will list that user's children's names to choose from, so if multiple products are bought of the same product for different children this can help differentiate who the product is to be delivered to. |
| 12 | User sets own price (optional) | Most often used for donations when you want the user to be able to choose their own value. |
| 13 | Add'l notes required | If you want to require the user to add something in the Additional Notes field, check this box |
| 14 | Heading for additional notes (optional) | Optional box to allow user to input extra information. This box will not be displayed unless it is used as an option. |
| 15 | Price suggestions (optional) | Used to provide suggested amounts on your ordering page. A special value is -1 which will disable the "other amounts input by user" option |
| 16 | Description (optional) | Description of the product. |
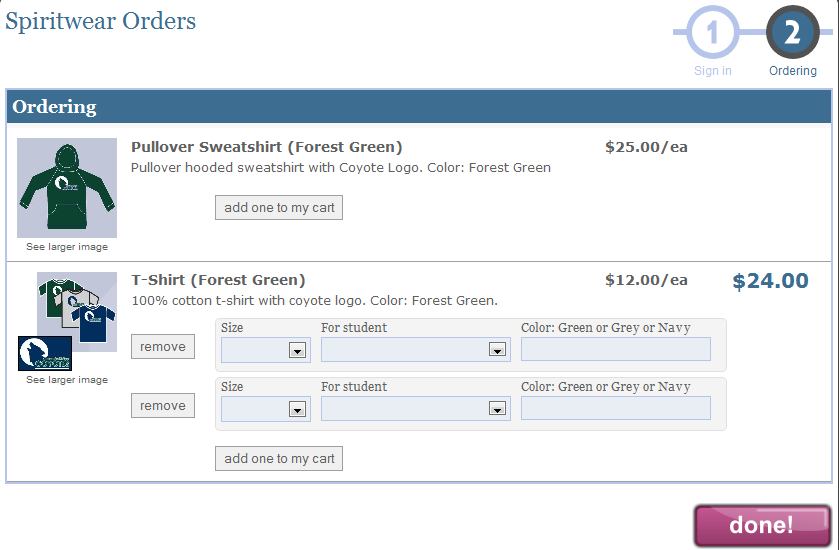
Initially this product will look like this:

Once the User selects [add one to my cart], it will look like this:
Note: There is no 5 or 6 on these pages because the date the products are offered are not displayed, however, if the user had come to this page during a date that was not between the begin and end date, s/he would have received a default message stating that the product was no longer available.
Below is an image displaying what this second product will look like with these features added: